
Overview
To interact (create, edit, view, delete, etc.) with a work item in Shibumi users must be assigned to a role that has permission to access the work item. Permissions are inherited downwards which means a user assigned to a role on a work item will have access to the work item as well as all descendent work items.
The default permission (i.e., access level) the user has on the work item is defined by the role assignment. Each role is assigned to one of three access levels: Admin, Edit, or View.
There are five out-of-the-box roles available on every template. The table below identifies these role and their associated access levels.
| Role | Access Level | Manage Roles | Read | Edit | Create | Copy | Move | Delete |
| Owner, Sponsor, Admin | Admin | ✓ | ✓ | ✓ | ✓ | ✓ | ✓ | ✓ |
| Collaborator | Edit | ✓ | ✓ | ✓ | ✓ | ✓ | – | – |
| Viewer | View | – | ✓ | – | – | – | – | – |
Your solution may have additional custom roles. When creating the custom role, the App Admin will select an access level for it.
For roles with the Edit access level, when the App Admin “enables” the role on a template, which means that the role will be available on instances of the template, he/she can further define whether the role can manage role assignments. If the ability to manage roles is allowed, any users holding this role will be able to assign users to any roles with access level of Edit or View. They will not be able to manage assignments to Admin access level roles.
You can see the access level of each role on the Roles tab of either the Template or the App.
Notes:
- Enterprise Admins have the ability to flag external users as Guest users. This prevents them from seeing the Participant Window or the user list in any section, thus preventing them from making any role assignments regardless of the role(s) they hold.
- The access level defines the default permission for the role on a work item. With additional configuration logic, however, the App Admin could further restrict permissions. E.g., the App Admin could define tab visibility logic allowing only users holding the Finance Team role to see the Finance tab. Even though users hold other roles with Admin access level, if they do not hold the Finance Team role, they will not see the tab.
- Roles are multi-user. There is not a limit on the number of users that can be assigned to a role.
- Users can be assigned to multiple roles on a single work item.
- When a user holds multiple roles, the default access level for the user will be the highest level of their assigned roles. This logic applies to inherited roles as well. E.g., if a user is assigned to an Admin access level role at the Program level and then assigned to an Edit access level role to a descendant Project within the Program, the default access level for the user on the Project will be the Admin access level.
Participant Window
The Participant Window allows for the management of role assignments on a work item.
Assign Users to Roles
- Click on the avatar icons to open the Participant Window.
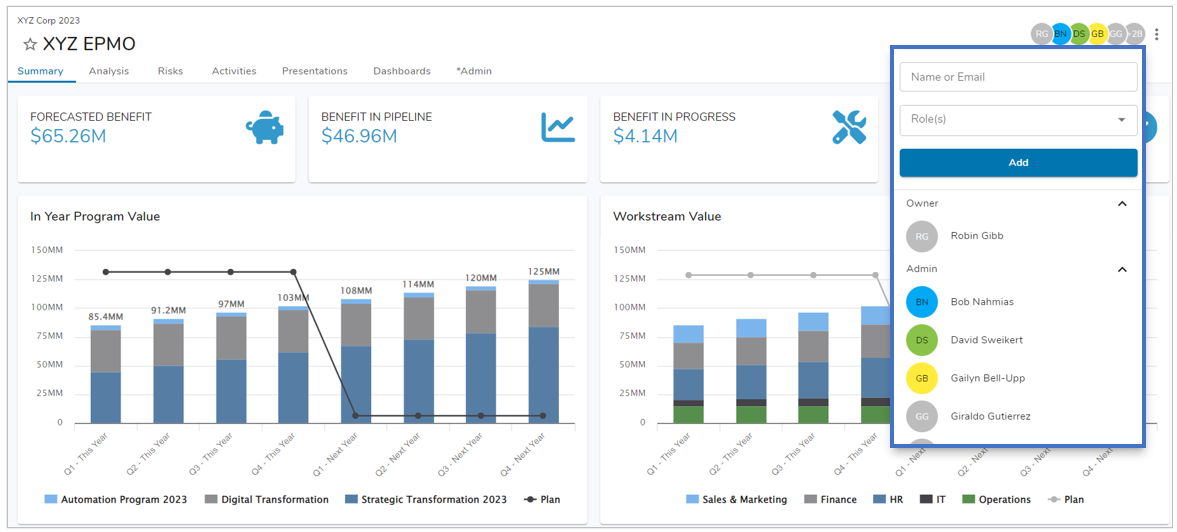
- Enter the email address of the user you’d like to add.
- For first time users, Shibumi will email an invitation to the user to setup an account and login.
- For existing users, when you start typing the user’s name or email, it will auto-complete.
- Select one or more roles for the user. Roles that have been enabled on the template will be available in the dropdown.
- Finally, select the blue ‘Add’ button below to add the user to the item.
Notes:
- Users with the enterprise admin Guest tag will not be able to view the Participant Window regardless of role(s) held.
- Holding down the Command or Ctrl key on your device (Mac vs PC) will allow you to select multiple roles without the dropdown closing.
- Visible To includes all users that do not directly hold a role on the work item but that have inherited permissions to see the work item from an ancestor work item role assignment. (Remember: permissions are inherited to descendent work items. E.g., if a user is assigned to a role on a Program that includes five Projects, the user will have access to the Program and all of the Projects.)
- Users can also be assigned from a role column included on a List/View, or from a role field on an Edit/Create Form.
Manage Role Assignments
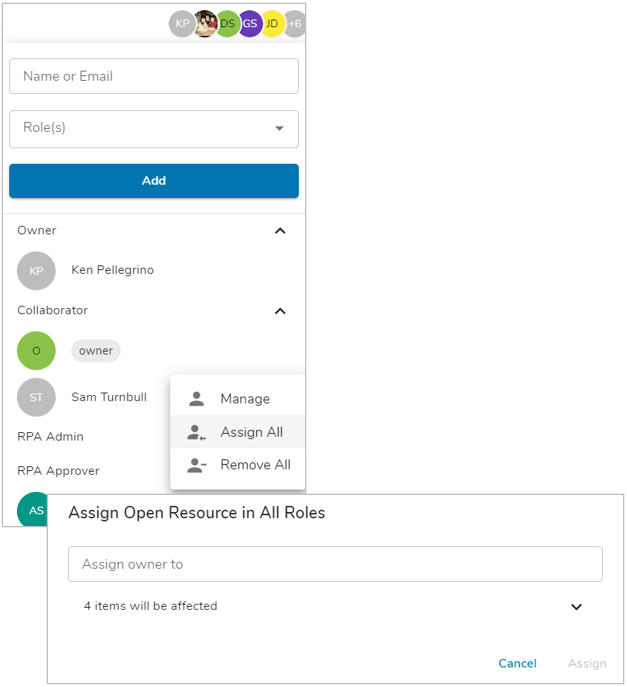
To manage role assignments for a user, open the Participant window and click on the user. A floating menu is displayed with three options: Manage, Replace All, Remove All.
Note: If you do not hold a role with the ability to manage roles, you will not see the floating menu.
Manage
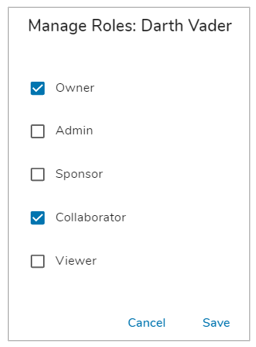
- The Manage Roles window displays all roles enabled for the work item. The roles held by the user will be selected.
- Select or deselect roles to add or remove the user to or from roles on the work item. Click Save.
Replace All
- The Replace All option replaces a user in all roles they hold on the current work item as well as on any roles they hold on descendant work items.
- On the window, select another user to replace the current one in all roles. Click Replace.
Remove All
- This Remove All option removes the user from all roles on the current work item. It does not remove the user from roles held on descendant items. A dialog will ask you to confirm the removal. Click Remove.
Permissions
Permissions are inherited downwards. E.g., a user assigned to an Admin access level role on a Program work item will have Admin access to the Program as well as on all descendant Project work items.
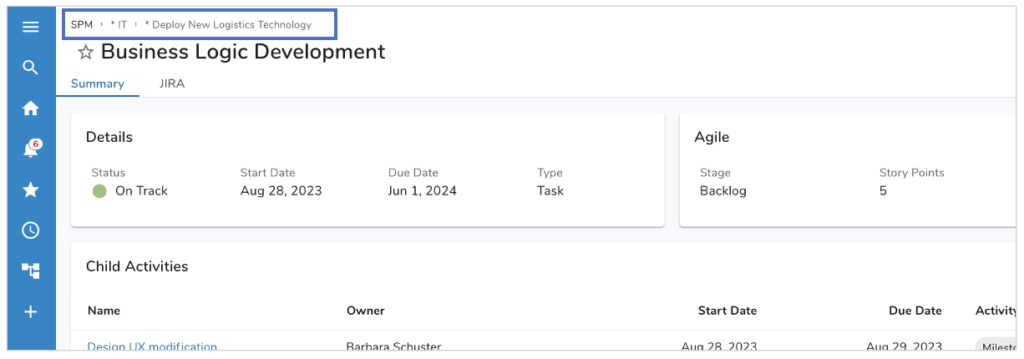
Conversely, permissions are never inherited upwards. No users will have access to the items above the highest level to which they are directly assigned a role.
For example, in the screenshot below, Jane Doe has been assigned as Collaborator on the *IT workstream within the Digital Transformation program. Jane has access to all of the descendant projects and milestones within the workstream. When Jane opens the Business Logic Development milestone, the breadcrumb trail above the title of the milestone will not extend past the *IT workstream level.
Note: The (un-clickable) App name is listed to the left of the highest level the user has access to.
Additional Role Functionality
Owner Role
Owner is an out-of-the-box, Admin access level role. The creator of a work item will automatically be assigned to the Owner role in the follow scenarios:
- The work item is created from a List section. For these sections, the Owner field cannot be included on the Add Item dialog so the creator is assigned by default.
- The work item is created using Bulk Edit on a List section and the Owner role is not included on the Bulk Edit form or is on the form but is left empty.
- The work item is created via a Create Form or Sidebar Create and the Owner role is not included on the form or is on the form but is left empty.
An Owner is not automatically assigned for work items created via the following methods, but can still be assigned manually:
- Create Work Item Business Rule (can use an Assign Role Action to assign Owner, if desired)
- Import/Export section (can include Owner as a column to assign Owner, if desired)
- Child Work Items populated from a template
- Dashboards/Presentations that came from a template
- The GraphQL API
Placeholders / Open Resources
- Shibumi provides the ability to define a “placeholder” role. This is referred to as an Open Resource and can be defined in the Participant Window for any work item in the solution. It allows for a placeholder role assignment on work items without assigning a user. Open Resources are often used when the details for a work items are not yet ready to be shared with all users but it is valuable to understand which roles will be participating.
- Until the Open Resource is filled, it will be displayed with a gray background.
- To fill the Open Resource, the user clicks on the Open Resource, selects the Assign All option, and selects the user that will be assigned. This will apply to all roles the placeholder holds on the current item as well as on all descendant items.
Note: One common application of the Open Resource capability is for the Program Admin to assigns roles to the Open Resource throughout the program and, only when the solution is fully defined, assigns a user to the Open Resource. All items in the program assigned to the Open Resource are then assigned to the designated user and summarized into a single email invitation.