| Goal | Topics to Cover |
|---|---|
|
|
As an Opportunity Owner, you propose and build the business case for new opportunities, track the progress of opportunities through stage gates, and oversee opportunity implementations. Once an opportunity has been delivered, you also track the benefit provided by the opportunity to ensure achieved benefit matches the anticipated benefit outlined in the business case.
It is important for you to provide up-to-date information about the opportunity to the Automation CoE and your executive team. The investment made into each opportunity is justified by the anticipated value to be achieved when the opportunity is delivered. The opportunity information you provide helps your CoE and leadership team understand current state and make strategic decisions.
Before you can access the RPA Accelerator to enter and update opportunity information, however, you must Join Shibumi and create an account.
Access the Program
After creating an account, you will be authenticated into the RPA Accelerator with the program content displayed by default.
The program or the opportunity dashboard is defined as the homepage. In addition to the Home Icon, you can use the Navigation Tree to see and access the opportunities. You can access these from any page (both routes are highlighted below).
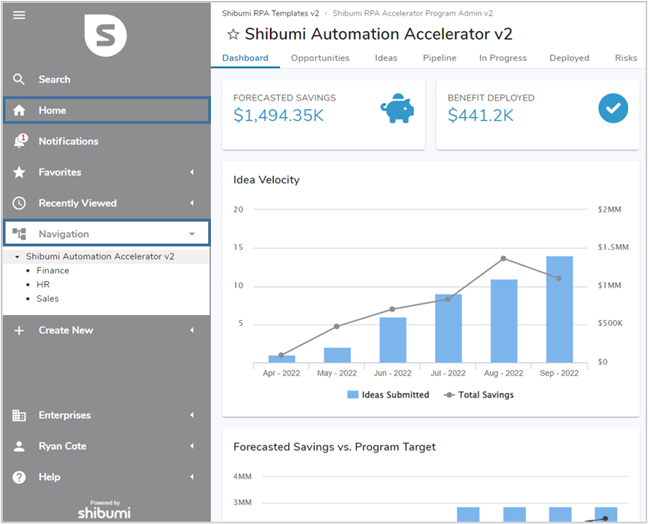
Note: when your Automation Lead set up the RPA Accelerator, they invited you into the program level or into an opportunity which triggered the email prompting you to join Shibumi. Permissions are inherited downwards within the RPA Accelerator. If you were invited into the top-level Program, you have the ability to access and edit all unlocked data in the workstreams and opportunities. If you were invited into a specific, lower-level opportunity, however, you would only be able to edit information specific to that opportunity.
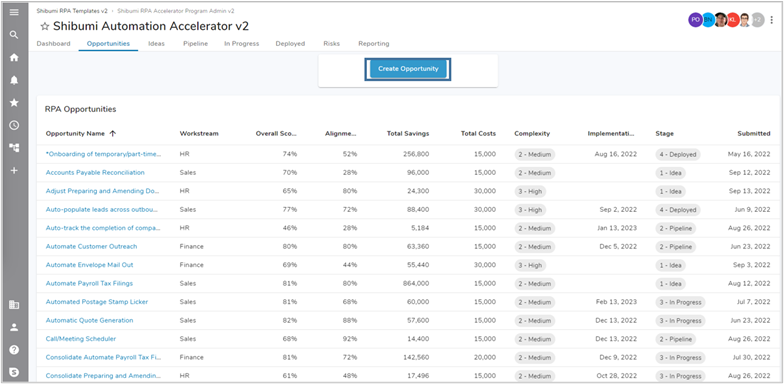
Create an Opportunity
To create a new opportunity, click on the Create Opportunity button on the Opportunities tab or the Opportunity Dashboard.
When the Create Opportunity process is initiated, you will be prompted to answer questions used to categorize and define the anticipated value of your proposed opportunity.
Once you have submitted the responses to the questions, the new opportunity is created and you are provided with a link to it so that you can continue to edit opportunity information and to monitor the approval process.
You can see an example of the questions included in the opportunity creation process below:

Manage the Opportunity Data
On the Opportunity, the tabs organize and group key information.
You can access the tabs by clicking on the tab names. The name of the currently displayed tab is highlighted in blue. By default, you will land on the Opportunity Summary tab.
The tabs are described below:
| Tab | Description |
| Opportunity Summary | monitor overall delivery status and advance the opportunity to new stages |
| Details | review costs, benefits, and the alignment of the opportunity to the program’s strategic goals |
| Activities | create and track the status of activities required to implement the opportunity |
| Execution Tracking | view the automation process and digital worker information associated with the opportunity |
| Workflow | review delivery status of opportunity, submit for approval/approve, retire and cancel the opportunity |
| History | audit field edits, status changes, and stage approvals |
Opportunity Summary Tab
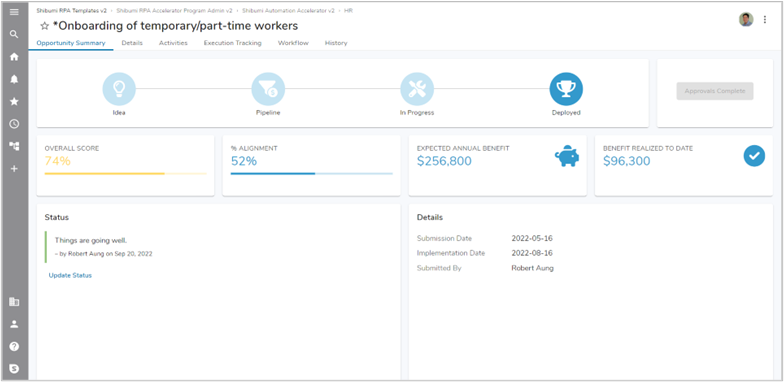
Edit the Status message by clicking on the Update Status hyperlink.
Submit the Opportunity for stage gate approval by clicking the “Submit for Approval” button.
Details Tab
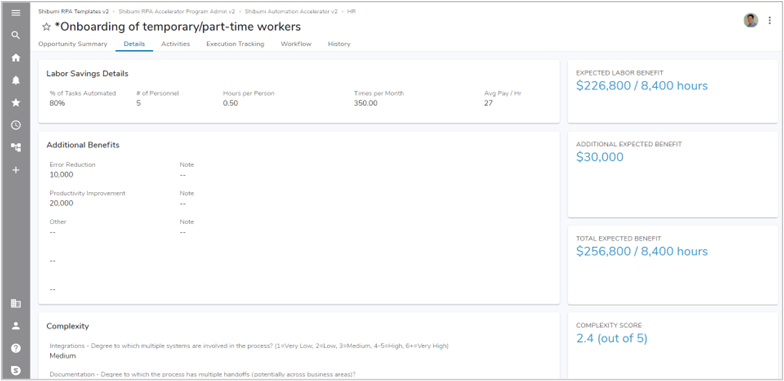
The details initially displayed for the Opportunity were entered on the Opportunity Intake form. Edit any data by clicking on the edit icon for the field. Once you’ve clicked the icon, the form toggles to edit mode. Update the content and then click the Save button on the form to save the newly entered or edited values.
As you change details on the left, the value summaries on the right will update to reflect the modifications. The overall prioritization score for the Opportunity is derived from the expected benefit, estimated cost, complexity, and alignment.
Workflow Tab
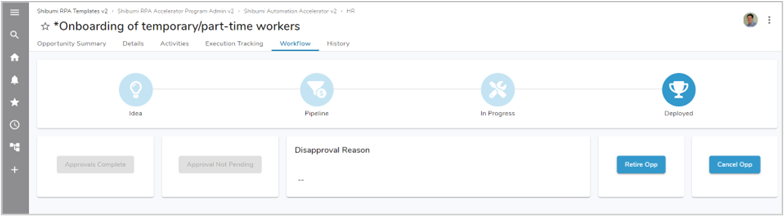
On the Workflow Tab, you will see four blue buttons. Each of these are described below:
- Submit for Approval: This button will notify the Approvers that the opportunity is ready for review and approval. once you have submitted the Opportunity, the label on this button will change to “Approve”.
- Approve: If you have permission to approve opportunities, you can click this button to approve the opportunity to move into the next stage gate. Depending on which gate the opportunity currently resided this could be disabled.
- Disapprove: This button will be disabled until a Disapproval Reason is entered. By clicking this button, the opportunity does not progress forward and a notification email is sent to the Opportunity Owner. The Opportunity Owner can then either address the disapproval reason or Cancel the opportunity.
- Retire Opp: The Retire and Cancel buttons both set an inactive disposition for the opportunity. The Retire button indicates that the automation opportunity was deployed but has now been retired.
- Cancel Opp: The Retire and Cancel buttons both set an inactive disposition for the opportunity. The Cancel button indicates that the automation opportunity was not approved to be deployed.
History Tab
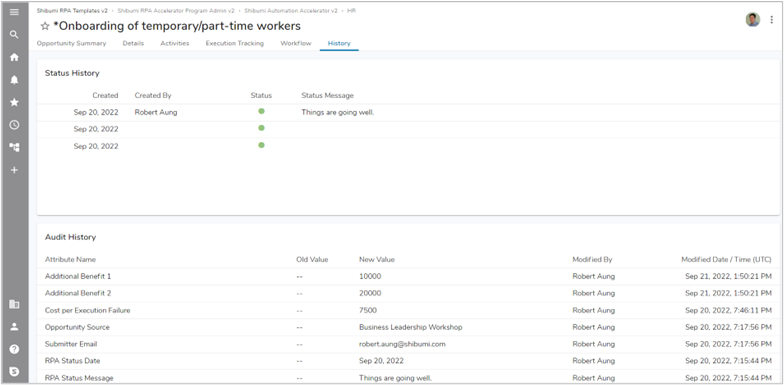
Review Status history and modification made to the Opportunity data on this tab.
Create and Manage Activities
Once the Opportunity is approved and moves to the In Progress stage, the automation implementation activities begin. While implementing, from the Activities tab, you can create, edit, and assign activities.
Activities are created by navigation to the Activities tab and selecting the grey plus (+) button located in the right side of the opportunity name on the Activities Gant section.
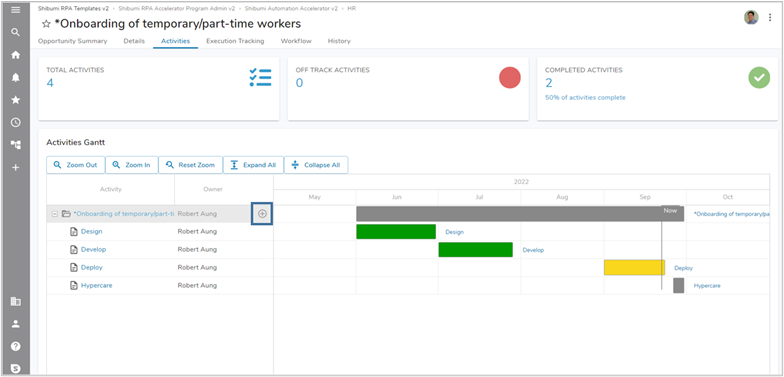
Input the Name, Start Date and Due Date into the Create a new Automation Activity dialog. Once saved, the activity will be generated on the Activities Gantt section.
From the Gantt, you can hover over and select one of the activities to open the Preview Pane for the specific activity. The Preview Pane allows for quick tracking and editing of certain features of the activity, such as the Completion Date.
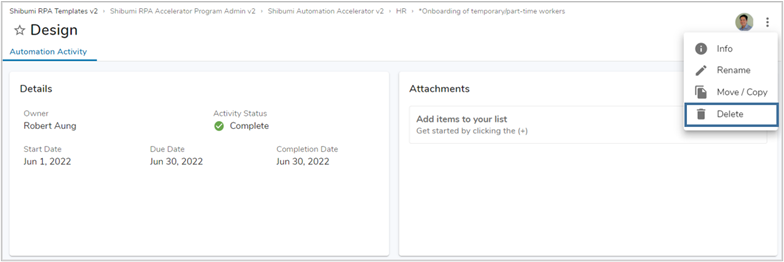
To delete an activity, select the blue hyperlink name for the intended activity. The Automation Activity will open in a new tab, from here select the three dots in the top right of the page and choose the Delete option.
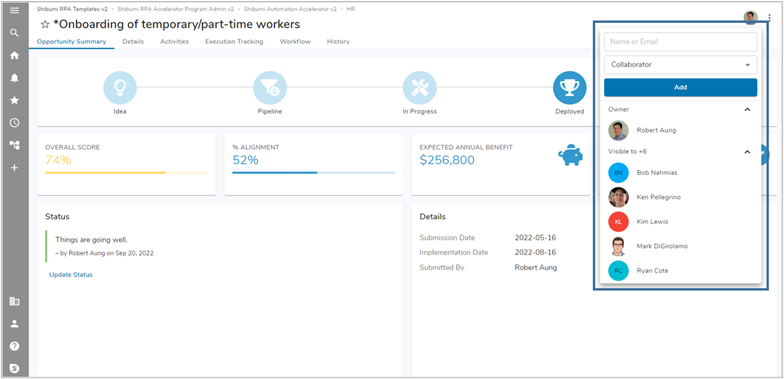
Managing Team Members
To invite people into the RPA Accelerator, use the Participant Window. Begin by navigating to the work item to which you want grant access; then click on the person silhouette icon at the top right of the page.
From the Participant Window, you can invite a user into a role on the Opportunity.
- If you are adding an existing RPA Accelerator user, begin typing the user’s name and intelligent type ahead will propose matches. Select the correct match. Select the role the person will fill. Click Add.
- If you are adding a new RPA Accelerator user, type the user’s email address. Select the role the person will fill. Click Add. The new user will receive an email inviting them to set up an account. Once suer has set up the account, he/she will be able to access the work item.