
Overview
The Export/Import section provides users with the ability to download an Excel file of work items (i.e., instances of a specified template type) and upload the edited file to update and create records within their solution. 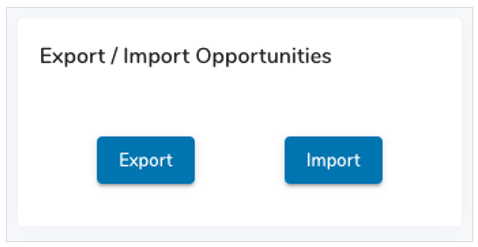
The exported file will contain columns configured by the app/dashboard/presentation Admin, as well as three system columns (ID number, template API name, and parent work item name). The system columns should not be edited, as they are used by Shibumi to identify which records to update upon Import. Similarly, the configured columns display their API names as their column headers so the system can identify which attributes/metrics/roles to update upon Import.
When configuring columns to include in the export file, you can decide whether they are editable or locked. Locked columns will be grayed out in the file and any edits to those column values will be ignored on Import.
Note: If an Enterprise Admin has disabled exporting in your enterprise, the Export/Import section will not be visible in the Add Section dialog. Additionally, templates with existing Import/Export sections will be given an error message notifying that Exporting is no longer supported within the enterprise.
Adding an Export/Import section
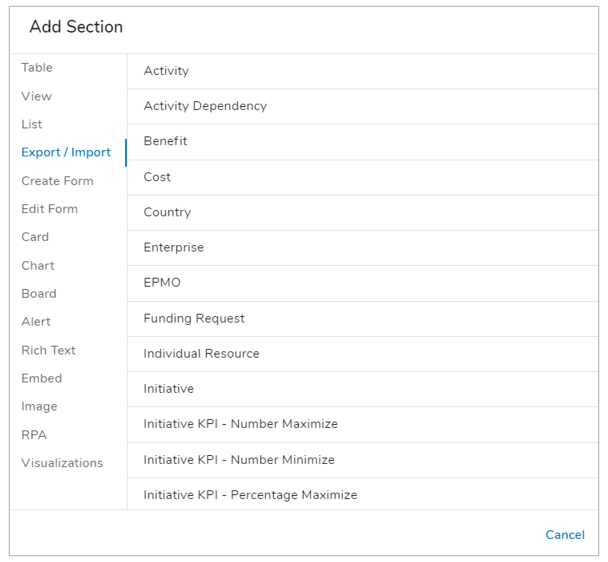
- On a layout, open the Add Section dialog.
- Select the Export/Import option from the left panel.
- Click on the template of works items you’d like to export/import. The section will be added to the layout.
- Configure the section then click Publish on a template to make it available to users.
Configuring an Export/Import section
- Click the settings gear in the upper right corner of the section and select Settings.

- Select which buttons to display:
- Import & Export – display both buttons in the same section so users can easily download then upload their file.
- Export only – display only the Export button.
- Import only – display only the Import button.
- (Optional) Add Hierarchy Columns
- Click the blue ‘+’ to configure any number of Ancestor Columns to define a hierarchy for the work items. Including these additional columns will help the system qualify under which parent item new items will be created.
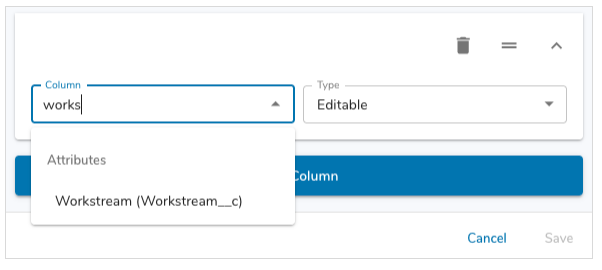
- Add Columns
- By default, the Name column will be included in the list.
- Click the Add Column button to add a new column.
- In the Column dropdown, select the Attribute, Role, or Metric to include in your exported file. Note: you can begin typing in the Column field to filter the options available for selection.
-
- Set the Type of column:
- Editable – column edits will be applied to Shibumi upon Import.
- Locked – columns will be grayed out in the export file and any edits will be ignored upon Import.
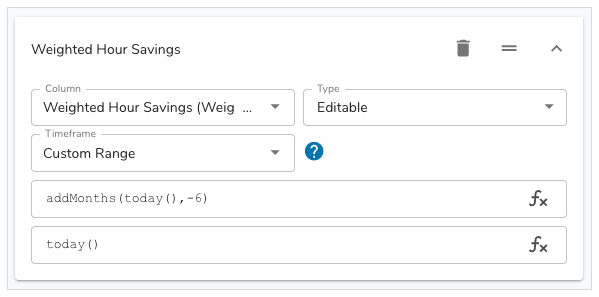
- For Metric columns, choose the timeframe of columns to display. For example, selecting This Year for a monthly metric will result in 12 monthly columns in the exported file.
- Select Custom Range to dynamically enter a timeframe using the Shibumi Expression Language.
 Note: Any calculated metric or attribute columns must be configured to be locked on export. If they are not locked, you will receive an error when trying to import the edited file.
- Set the Type of column:
- Reorder columns by selecting the reorder icon and dragging the column to a new position.
- Delete columns using the trash can icon.
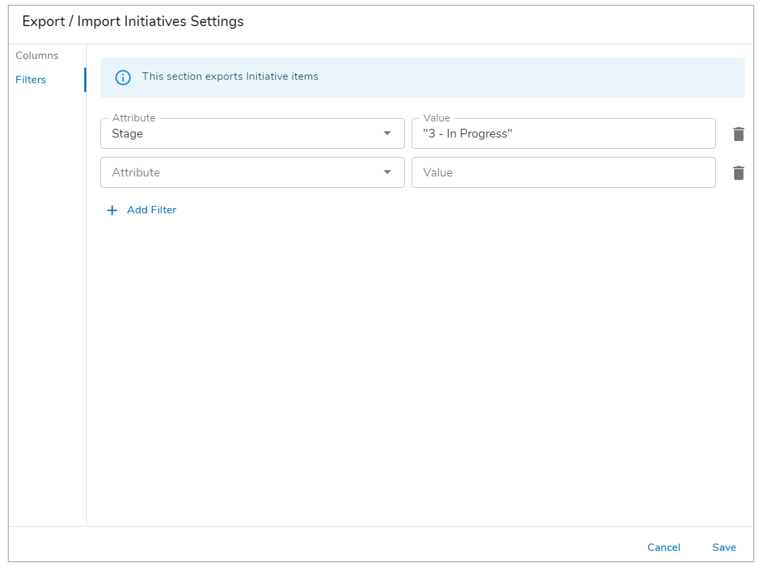
- Click the Filter tab to filter the export file that will be produced. In the dropdown, select the attribute to use for the filter. Enter a value. Our existing filter language is supported (<, >, =, !=, {!attribute__c}, etc.).
- Save the section.
Note: On import, Association columns will be matched by name. If there are multiple potential name matches, the import will fail due to a duplicate name match. If the Association Filter Context is set to an Ancestor item or an already set Association, this will help prevent the duplicate name error matches. If the Association Filter Context is set to an Association whose value is also being set in the same file, the system will not take that value into consideration and the file could be blocked due to a duplicate name match.
Exporting/Importing Data
To export the configured data, click the Export button. An Excel file will be downloaded to your device. Data will be displayed in the necessary format to import without errors (e.g. dates will be displayed in the YYYY-MM-DD format).
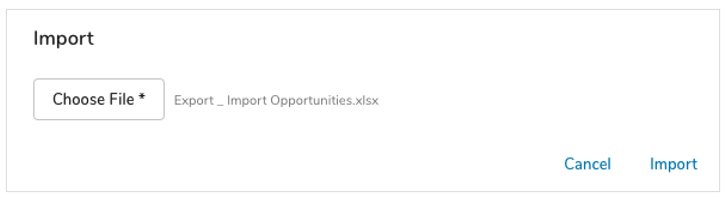
Edit row values within the file. Do not edit column headers or system column values. To import the edited file, click the Import button. Select your file. Click Import.
Formatting errors that block import will be displayed within the Import dialog. If the file is no longer in an acceptable format (e.g. the system columns have been deleted), a general error message will be displayed.
Creating Items
To create items on import, add new rows representing the items to be created upon Import. The template API name (type_system), parent work item name (parent_system) and any ancestor (ancestor_system) columns must be filled out. Leave the ID (id_system) column empty for new items, as ID numbers will be generated upon Import.
New items will be created upon Import. The defined ancestor path (parent + ancestor columns) must be unique or it will cause the import to fail.