
Overview
App Admins can define and configure Rules to incorporate business logic in their Shibumi solutions.
Rules are a set of actions that are executed when certain conditions are met. These rules automate the process of assigning a role, creating a work item, setting a value, sending email notifications or calling a URL when the rule is triggered.
A rule consists of the following elements:
- Trigger: Rules can be triggered on creation or deletion of a work item, on the edit of an attribute, metric data set, or role assignment, on the date of a date attribute, or scheduled to run on a specific day and time.
- Condition: This field will be evaluated when the rule is triggered. An expression can be written to determine the criteria under which the rule should run. Depending on whether the expression evaluates to true or false, the corresponding actions will be triggered.
- Action: Actions run when rules are triggered. Rules can assign users to roles, create work items, set values, send notification emails, or call URLs. Actions can be set to run when a rule condition resolves to either true or false.
Adding and Configuring a Rule
On a template, toggle to the data panel and select the Business Rules tab.
In the left pane, click the Plus button to create a new rule.
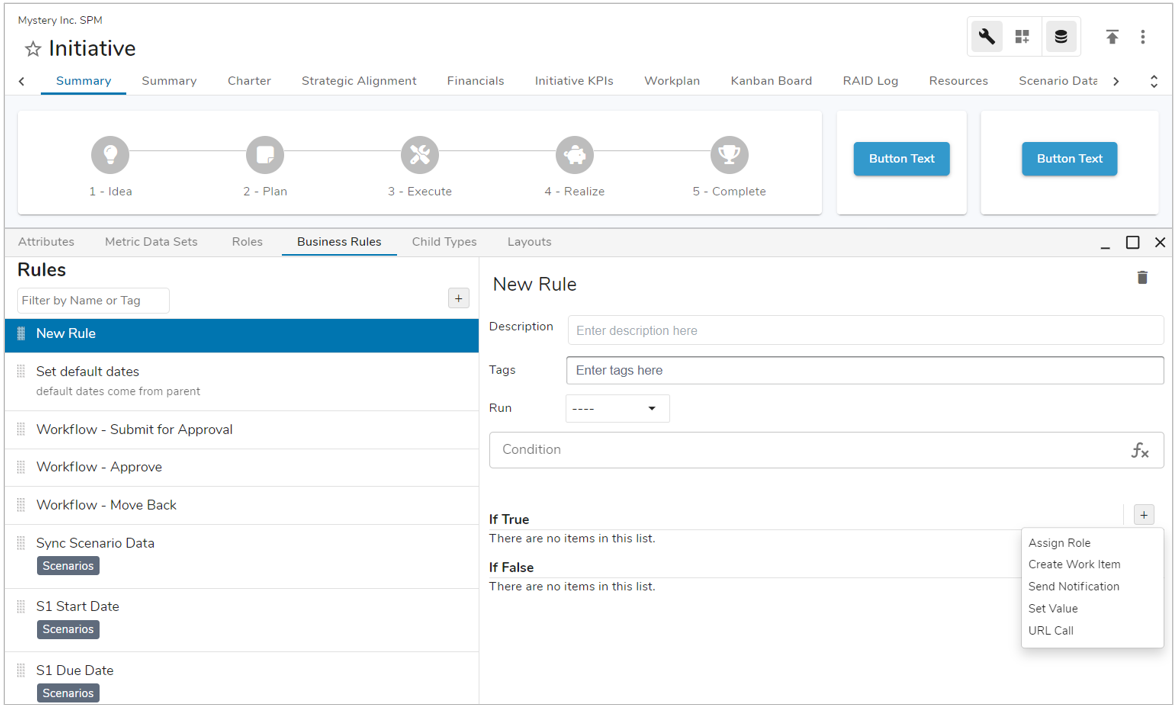
A new rule will be created and displayed in the right pane. Edit the name of your rule by clicking on the pencil icon that appears when you hover over the rule name at the top of the right pane. A description and tags can be added to your rule to help with organization. This will help you easily manage your rule inventory.
Next, set the trigger for your rule by making a selection in the Run dropdown.
- When On Create is selected the business rule will run upon creation of a work item from the template you are currently on.
- When On Delete is selected the business rule will run upon deletion of a work item from the template you are currently on.
- When On Edit is selected, you will define an attribute, metric data set, or role assignment whose edit will trigger the rule.
- When On Date is selected, you define a date attribute as the date to run and a time.
- Scheduled options include Weekly, Monthly, and Yearly.
Note: All scheduled rules run in UTC (Coordinated Universal Time). When defining scheduled rules, convert your local time to UTC.
Set the condition for your rule. The conditional expression will be evaluated when a rule is triggered and result of the evaluation will determine which actions are initiated (if any).
Note: If the Condition field is left blank, the conditional expression will default to Always True.
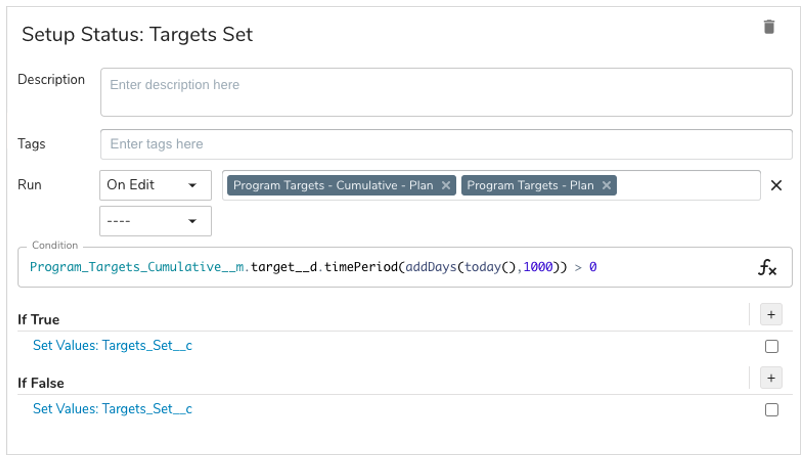
Next, configure the action(s) you’d like to run when the condition resolves to true or false.
Click the plus button in the true or false section and select the desired action from the menu.
- Assign Role: Assign participants to roles on work items or associated work items in the solution hierarchy.
- Create Work Item: Create new work items in the solution hierarchy.
- Send Notification: Send notifications to individuals that hold roles on a work item or associated work item in the program hierarchy.
- Set Value: Set the value of attributes and/or metrics.
- URL Call: Trigger a call to an external URL when a rule runs.
Visit the Business Rules Actions article to learn more about available actions and review examples.
When multiple rules are added to a template you can set the order by rearranging the Rules list in the left pane. This will determine the order in which rules run if they share the same trigger.
Publish the template.